Improperly secured bolted joints often lead to catastrophic mechanical failures. When parts endure intense vibration, standard fasteners quickly loosen. Thermal cycling and dynamic loads accelerate this dangerous process. This loss of tension puts entire systems at risk. Industry watchdogs recognize this escalating danger. Safety alerts from organizations like the NTSB routinely highlight fastener loosening. They cite it as a primary root cause of major accidents and machinery breakdowns. If you ignore proper fastening techniques, you risk severe safety hazards.
This article provides a comprehensive, evidence-based guide detailing how to use a lock nut correctly. You will discover practical selection criteria to match your operating environment. We cover step-by-step installation instructions to eliminate assembly errors. We also explore proven torque verification methods. Read on to master these critical techniques. You will ensure uncompromised joint integrity in your next assembly project.
Key Takeaways
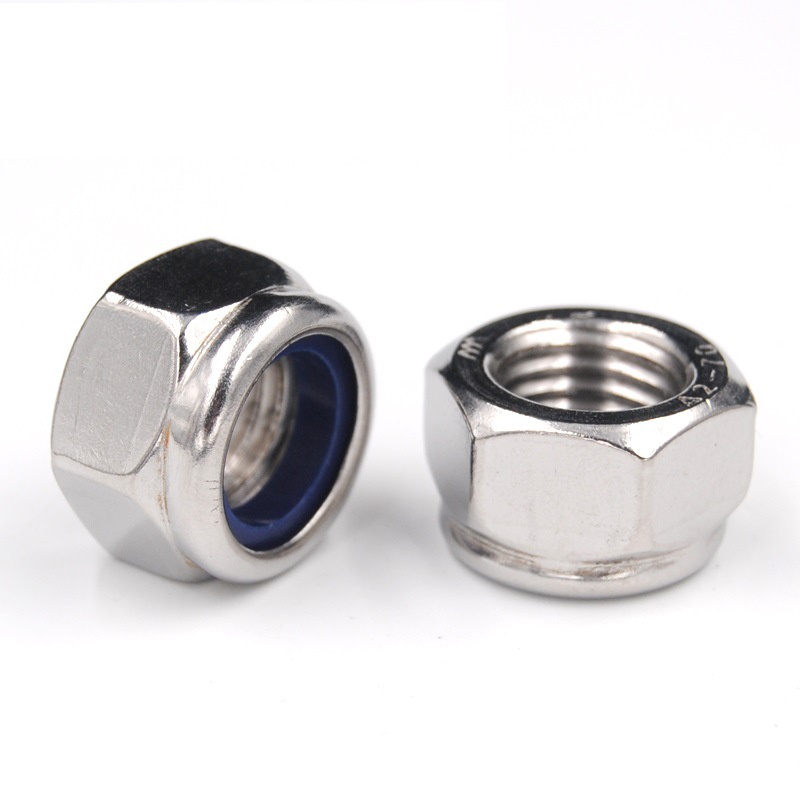
Direction matters: The locking feature (e.g., the nylon ring or distorted thread) must always face outward, away from the mating surface.
Reusability is a myth for most prevailing torque nuts; reusing them degrades their locking capability and compromises joint security.
Accurate tightening torque and proper bolt thread engagement are non-negotiable for achieving the correct clamping force without inducing fastener fatigue.
Material selection (Nylon vs. All-Metal) must be dictated by environmental factors, specifically operational temperatures and chemical exposure.
The Engineering Problem: Why Standard Nuts Fail (and When to Upgrade)
Understanding the Mechanics of Self-Loosening
Engineers constantly battle the mechanics of self-loosening. Standard nuts rely purely on friction. This static friction generates from the clamping force between mating surfaces. Dynamic vibration easily overcomes this static friction. Transverse joint movement slips the threads laterally. Once the initial friction breaks, the nut backs off the threads rapidly. You lose clamping force in seconds. Tests like the Junker vibration test prove this phenomenon repeatedly. A standard fastener loses all preload under severe transverse vibration.
Success Criteria for Lock Nuts
To fix this, you need a specific mechanical intervention. A proper locking mechanism must provide prevailing torque. This term means the fastener resists rotation even when not fully clamped. It grips the bolt threads actively. This constant rotational resistance prevents the nut from backing off under dynamic load. It acts as a safety net against vibration. Even if some clamping force diminishes, the prevailing torque keeps the fastener secured to the shaft.
The Cost of Failure
Failing to upgrade standard fasteners carries severe risks. You face costly unplanned downtime in production environments. Heavy machinery suffers catastrophic damage when linkages separate mid-operation. Equipment repairs quickly drain maintenance budgets. More importantly, loose assemblies create serious safety hazards for operators. A falling bracket or detached rotor can cause fatal injuries. Upgrading to a locking fastener mitigates these massive risks effectively. It protects both your physical equipment and your personnel.
Solution Categories: Choosing the Right Lock Nut for the Application
You must select the correct fastener for your specific environment. We categorize them into three main types. Each serves a distinct purpose in mechanical design. Making the wrong choice leads to premature joint failure.
Nylon Insert Lock Nuts (Nyloc)
These fasteners use a polymer ring to create friction. The bolt threads bite into this unthreaded ring during installation. They are highly effective for everyday applications. They also provide a slight seal against moisture.
Best for: General automotive repairs, standard industrial assemblies, and high-vibration environments.
Limitation: They cannot withstand extreme temperatures. The nylon insert typically degrades above 250°F (121°C). Once degraded, the locking mechanism fails entirely. They also react poorly to highly corrosive industrial chemicals.
All-Metal Lock Nuts (Stover / Top Lock)
These rely on a distorted thread design. Manufacturers crush the top threads slightly out of round. They grip tightly without polymer inserts. The metal-on-metal contact creates intense prevailing torque.
Best for: High-heat environments, heavy construction machinery, and demanding aerospace applications.
Limitation: They carry a much higher risk of thread galling. You require specific lubrication strategies to prevent seizing during installation. They also cause more wear on the bolt threads than polymer alternatives.
Jam Nuts (Two-Nut Systems)
This traditional method uses a thin nut jammed against a standard nut. The two nuts push against each other to lock in place. It requires no special inserts or deformed threads.
Best for: Mechanical linkages, rod ends, and scenarios lacking space for a prevailing torque nut.
Risk: This system is highly prone to human error. You must follow a precise tightening sequence to lock them correctly. You must tighten the thin nut first. Then, hold it stationary while tightening the thick nut over it. If done wrong, they loosen faster than a single standard nut.
Fastener Selection Guide
Type
Best Applications
Key Limitations
Temperature Tolerance
Nylon Insert
Automotive, high vibration
Fails above 250°F
Low to Medium
All-Metal
Aerospace, heavy machinery
Prone to galling
Very High
Jam Nut
Tight clearances, rod ends
High assembly error risk
High
How to Use a Lock Nut: Step-by-Step Installation Protocol
Following a strict protocol guarantees joint integrity. We outline the exact installation steps below. Skipping any of these steps compromises the prevailing torque mechanism.
1. Preparation and Inspection
First, verify the bolt threads. They must be perfectly clean. Remove any dirt, rust, or old thread locker. Ensure they are completely undamaged. Burrs or crossed threads will destroy the locking mechanism. You must also verify the threads match the nut's specific pitch exactly.
2. Orientation Rules
You must establish a strict visual rule for your team. The flat metal side goes onto the bolt first. The locking mechanism faces outward away from the joint. This applies to both nylon rings and distorted collars. Reversing this orientation prevents the locking mechanism from engaging properly. It also risks cross-threading the fastener.
3. Initial Threading (Hand-Tightening)
Thread the fastener by hand initially. Spin it down the bolt shaft freely. Stop when you feel noticeable resistance. This exact point indicates the bolt hitting the locking mechanism. Up to this point, the process feels identical to a standard fastener.
4. Specifics for Nylon Rings
During nylon lock nut installation, understand this physical resistance is completely normal. The polymer ring purposely deforms around the metal threads. This forced deformation creates the necessary friction lock. You cannot spin it further by hand. You must transition to hand tools to overcome this prevailing torque.
5. Driving the Nut
Use a calibrated hand tool to drive it home. A socket wrench or torque wrench works best. Drive it smoothly without stopping mid-turn. Warn your team against using high-speed impact wrenches. High rotational speeds generate extreme friction. This intense heat easily melts polymer inserts. For metal fasteners, impact tools cause severe galling almost instantly. Slow and steady rotation prevents these critical failures.
Validating Bolt Thread Engagement and Tightening Torque
You must verify your work post-installation. Visual checks and precise mechanical measurements prevent future failures. Do not assume a joint is secure simply because it feels tight.
Calculating Bolt Thread Engagement
Engineering standards define strict engagement rules for critical joints. You achieve full bolt thread engagement only when threads protrude visibly. Specifically, one to three full threads must extend completely past the locking mechanism. Why does this matter so much? Insufficient engagement directly causes shear failure. The internal threads strip out under dynamic loads. The clamping force drops to zero instantly. Always verify thread protrusion visually before signing off on an assembly. If the bolt sits flush or recessed, the bolt is too short.
Applying the Correct Tightening Torque
Torque dictates the final clamping force directly. Standard formulas calculate this relationship. Prevailing torque styles require a slightly higher torque input. They fight internal friction before any actual clamping begins. You must add this rotational resistance to your baseline torque value. This calculation ensures you achieve the target clamp load. Failing to account for prevailing torque leaves the joint under-tightened.
Pay close attention to chemical lubrication. Recommended tightening torque specifications change drastically if you apply anti-seize or oil. Lubricants reduce friction significantly across the mating threads. If you apply dry torque values to lubricated threads, you will over-tighten them. This common error stretches or breaks the fastener entirely. It yields the bolt past its elastic limit. Always adjust your torque wrench settings accordingly based on the specific lubricant used.
Implementation Risks: Reusability, Galling, and Maintenance
Field experience reveals several common pitfalls. Avoiding them ensures long-lasting and safe assemblies. Ignorance of these risks leads to premature field failures.
The Single-Use Rule (Experience/Adoption Risk)
You face a major risk regarding reusability. Nylon inserts and distorted metal threads permanently deform during initial assembly. They adapt perfectly to the specific bolt threads. Therefore, they should never be reused. Reusing them yields a false sense of security. The gripping power drops significantly after just one use. The prevailing torque falls below safe operational limits. Always discard them immediately after removal. Treat them as strictly single-use consumables to maintain safety margins.
Preventing Galling (Cold Welding)
Stainless steel hardware poses a unique physical threat. Using stainless nuts on stainless bolts often causes thread seizing. The industry calls this cold welding or galling. High friction strips the protective oxide layer from the threads. The bare metals then lock together permanently under pressure. You cannot undo this once it starts. To prevent this disaster, apply specific anti-seize compounds before assembly. Alternatively, use different alloy grades for the nut and bolt to prevent molecular bonding.
Inspection Protocols
You must establish a routine maintenance checklist. Evaluate joint integrity regularly in the field. Incorporate these precise steps into your maintenance protocols:
Conduct regular torque auditing to catch joint relaxation early. Check the breakaway torque periodically.
Perform routine visual inspections for any signs of backing off. Look for fresh metal exposed on painted threads.
Mark fastener positions using security torque putty. Apply a straight line from the nut to the flange. This provides a quick visual check for loosening.
Document all maintenance checks in a centralized engineering log to track long-term performance.
Conclusion
Standardizing your fastening protocols is absolutely critical. Across engineering and maintenance teams, strict consistency prevents failures. Proper selection dictates long-term joint success. The choice between nylon, metal, or jam configurations comes down to three factors. You must evaluate your operational temperature, vibration severity, and spatial clearance. No single fastener works for every application.
Do not leave your assembly integrity to chance. Consult technical specification charts before beginning any project. Contact a fastener specialist for bulk procurement advice. Always review specific torque charts tailored exactly to your chosen hardware application. Taking these structured steps guarantees a secure and reliable mechanical build.
FAQ
Q: Do I need to use a lock washer with a lock nut?
A: Generally, no. Combining them is redundant. Using both can actually introduce joint instability. The locking mechanism already provides the necessary prevailing torque to prevent loosening. Adding a washer creates another failure point. It introduces an extra surface that can embed or relax over time.
Q: Which way does a lock nut go on?
A: The flat, standard metal side threads onto the bolt first. The raised locking ring or distorted collar must face outward. This orientation allows the bolt to pass through the standard threads smoothly before engaging the locking mechanism. Reversing it prevents proper engagement.
Q: Can I use an impact driver to install a lock nut?
A: This practice is strongly discouraged. High-speed impact tools cause intense friction heat. This heat easily melts nylon inserts, ruining the grip. For all-metal styles, high speeds drastically increase the risk of thread galling and cold welding. Always use calibrated hand tools.
Q: How many times can you reuse a nylon lock nut?
A: Zero. For critical applications, they are strictly single-use fasteners. The nylon insert deforms permanently during the first installation. Reusing it compromises the prevailing torque entirely. You must replace it with a new one to maintain industry safety standards.